

How to Make an Invoice: Step-by-Step Guide (2026)
By Invoice Zip Editorial Team
5min read
Published:
Updated:
Getting paid starts with sending a clear, professional invoice — and you don't need accounting knowledge to make one. To make an invoice, you only need five things: an invoice number, dates, your business information, your client's information, and an itemized list of what you're charging for. This guide walks through the full process step by step, whether you use a spreadsheet, a template, or invoicing software.
What Is an Invoice?
An invoice is a formal document that requests payment for goods or services you've provided. It lists what was delivered, how much is owed, and when and how the client should pay. An invoice works as both a payment request and a legal record — it keeps your bookkeeping accurate, protects you in payment disputes, and helps you get paid on time.
👉 New to invoicing? Read our full guide: What Is an Invoice and What Is It Used For?
What to Include on an Invoice: 10 Essential Components
Every invoice, no matter the format, should contain these elements:
- Invoice number — a unique identifier (e.g., INV-2026-001) for tracking
- Issue date and due date — when the invoice was sent and when payment is expected
- Your business information — name, address, email or phone, logo (optional but recommended)
- Client's information — the "Bill To" section with their name and billing address
- Itemized list of goods or services — description, quantity or hours, and unit price
- Subtotal — the cost before tax and discounts
- Tax — VAT, GST, or sales tax, where applicable
- Discounts — if you've agreed on any
- Total amount due — the final figure, displayed prominently
- Payment terms and methods — due date terms (Net 7/14/30), accepted payment methods, and late-payment notes if any
👉 Want the complete checklist with a filled-in example? See What to Include on an Invoice: The Full Component Checklist.
Types of Invoices (and When to Use Each)
Most small businesses only need the standard invoice, but knowing the other types helps you handle special situations:
| Type | What it is | Best for |
|---|---|---|
| Standard | The default invoice for delivered goods or services | Most everyday transactions |
| Pro forma | An estimate sent before work begins | Quoting projects, customs paperwork |
| Recurring | Automatically issued on a schedule | Subscriptions, monthly retainers |
| Credit memo | Refunds a client or corrects an overcharge | Returns, billing errors |
| Debit memo | Charges a client extra | Under-billed work, added fees |
| Past-due | A reminder for an unpaid invoice | Overdue accounts |
| Commercial | Required for international shipments | Cross-border sales |
👉 Not sure which one fits your situation? See Types of Invoices Explained, with Examples.
How to Make an Invoice in 9 Steps
Step 1: Choose a Professional Invoice Layout
Before adding any details, start by choosing a clean, professional invoice layout. A well-structured layout makes your invoice easier to read, easier to pay, and more likely to be accepted by clients — and it reduces back-and-forth questions while keeping your invoices consistent with your brand. There are four common paths:
Option 1: Create your own invoice layout (Excel or spreadsheet)
You can build a custom invoice using Excel or Google Sheets — best for occasional invoicing and full layout control.
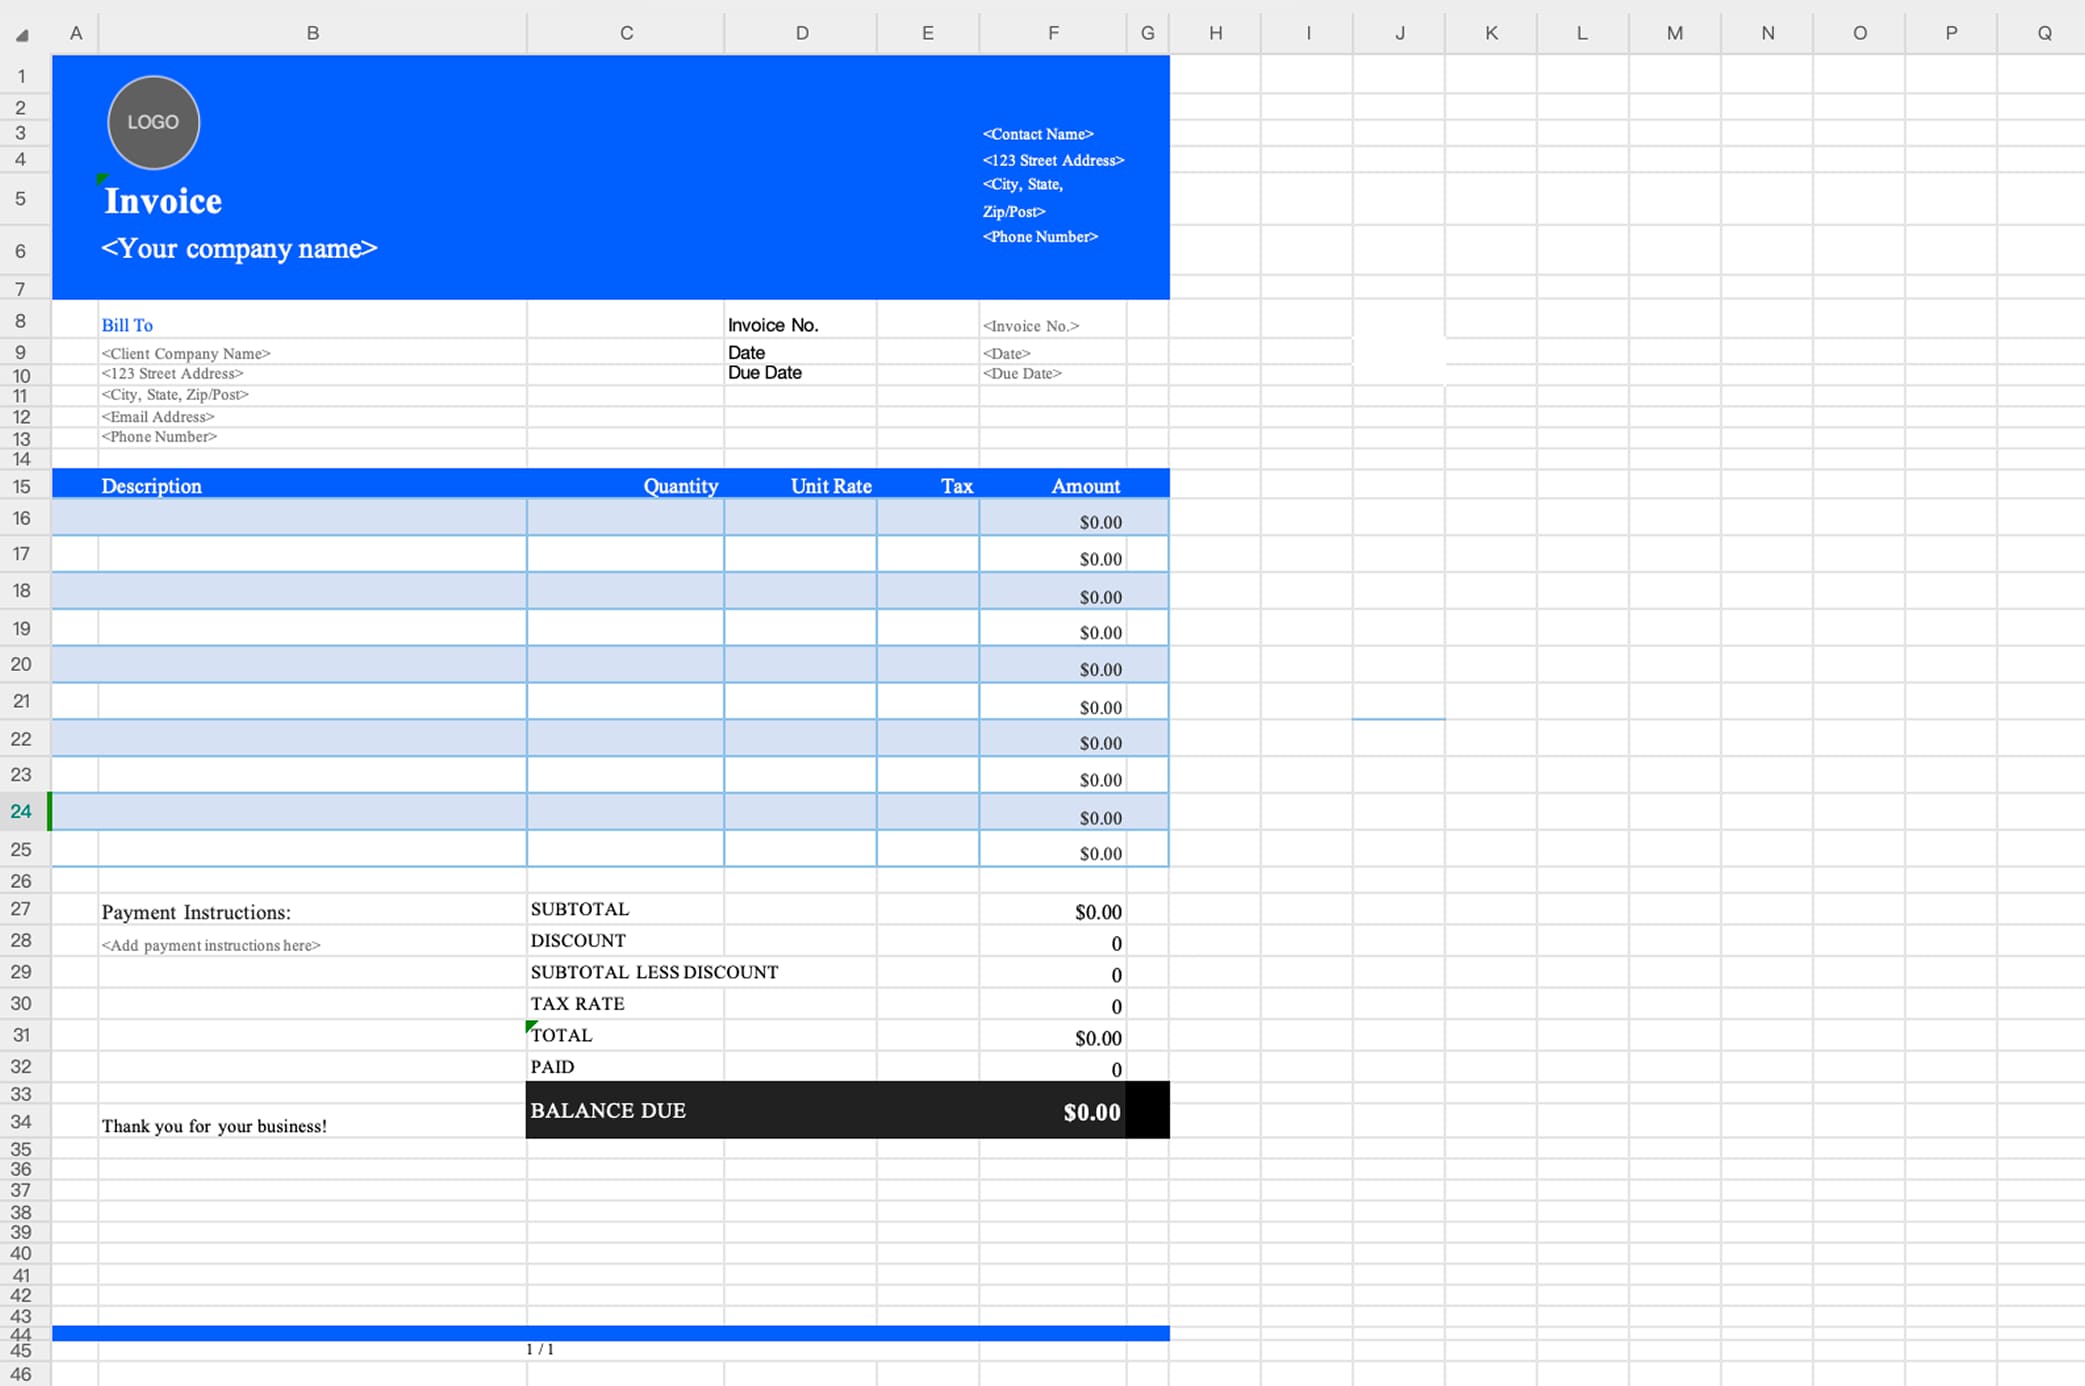
Your spreadsheet layout should include: invoice title and header, business information, client details, an itemized services or products table, and subtotal, tax, and total amount. While spreadsheets give you flexibility, manual layouts require careful formatting and calculations — errors in formulas or inconsistent formatting can easily lead to incorrect totals, especially as invoice volume increases.
Option 2: Use a ready-made invoice template
Invoice templates help you skip design work and start invoicing immediately. They're available in Excel, Word, and PDF formats.
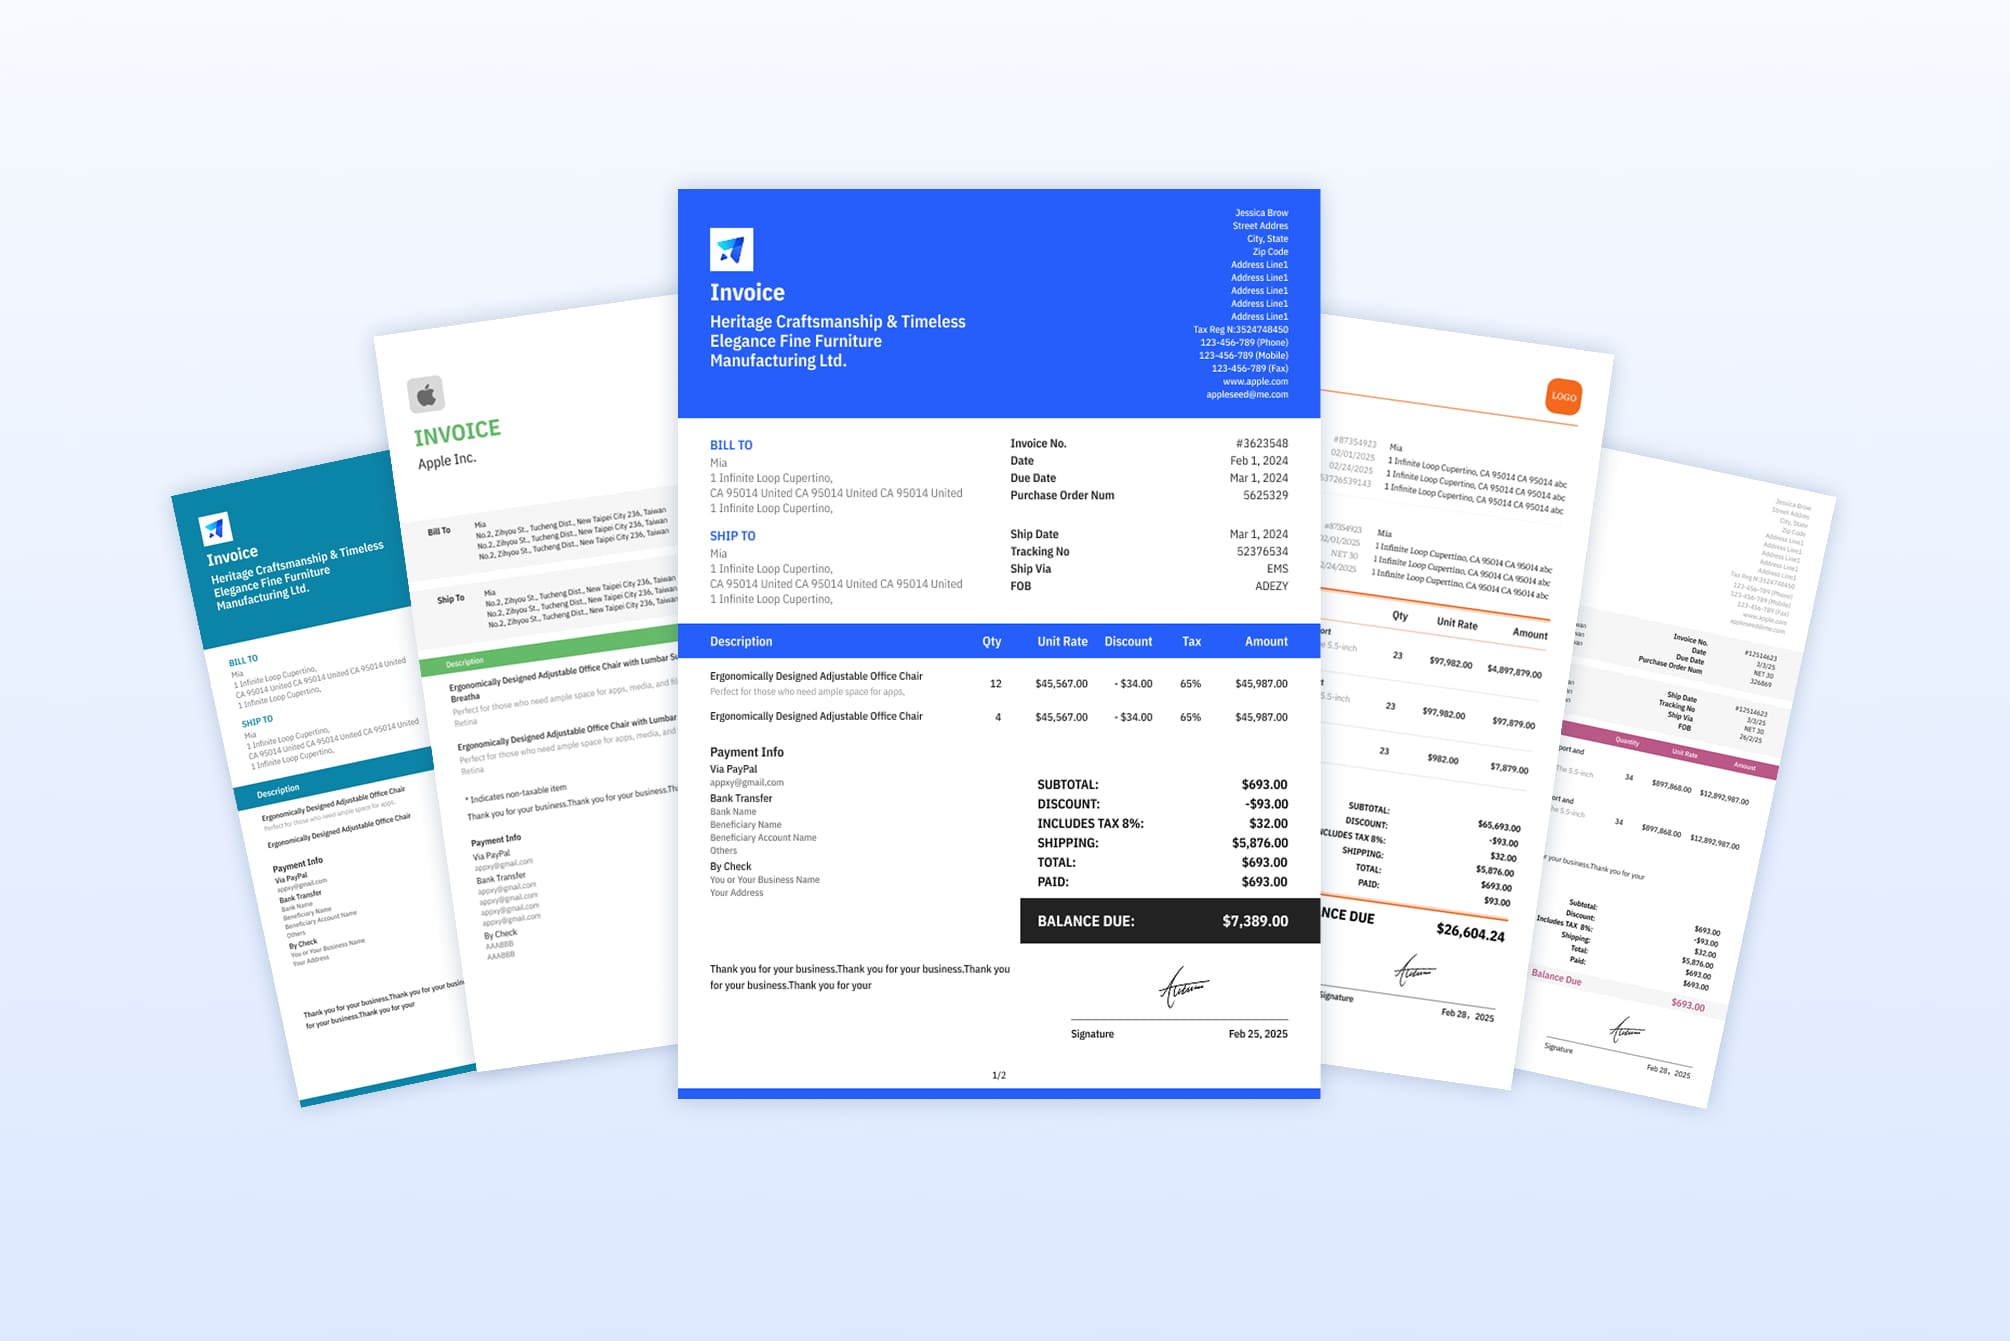
Templates provide a consistent structure and reduce setup time. Choose one that fits your industry, currency, and billing style. Templates still require manual input, and because they're editable, it's easy to accidentally break the formatting.
Option 3: Use an online invoice generator
An online invoice generator automatically creates a professional layout for you — one of the most convenient options. Clear advantages:
- Pre-designed invoice layouts
- Automatic calculations
- Export to PDF or email instantly
This option eliminates formatting and math errors while saving time — especially useful when you need to create, send, and track invoices quickly without managing files manually. One limitation: most online invoice generators do not save client or product information, so you may need to enter the same details again each time you create a new invoice.
Option 4: Use invoicing software
If you send invoices regularly, invoicing software offers more control and automation. Features often include client management, invoice history, recurring billing, and payment tracking. Ideal for contractors and agencies, recurring clients, and growing businesses — it reduces administrative work and improves cash-flow visibility as you scale.
| Option | Best for | Trade-off |
|---|---|---|
| 1. Build it in Excel / Sheets | Full layout control, users comfortable with formulas | One wrong formula = wrong totals |
| 2. Ready-made template | Fast setup, consistent look — free templates | Still manual input; formatting breaks easily |
| 3. Online invoice generator | Fastest route — layout & math handled — create invoice online | Doesn't save info; re-enter details each time |
| 4. Invoicing software | Regular invoicing, recurring clients, growing business — try it free | Requires an account |
Although these options differ in ease of use, the information required on an invoice is the same in all cases. Below, we'll use a basic invoice template as an example to show how to fill out an invoice step by step.
Step 2: Add Your Business Information
Once the layout is ready, add your business details at the top of the invoice.
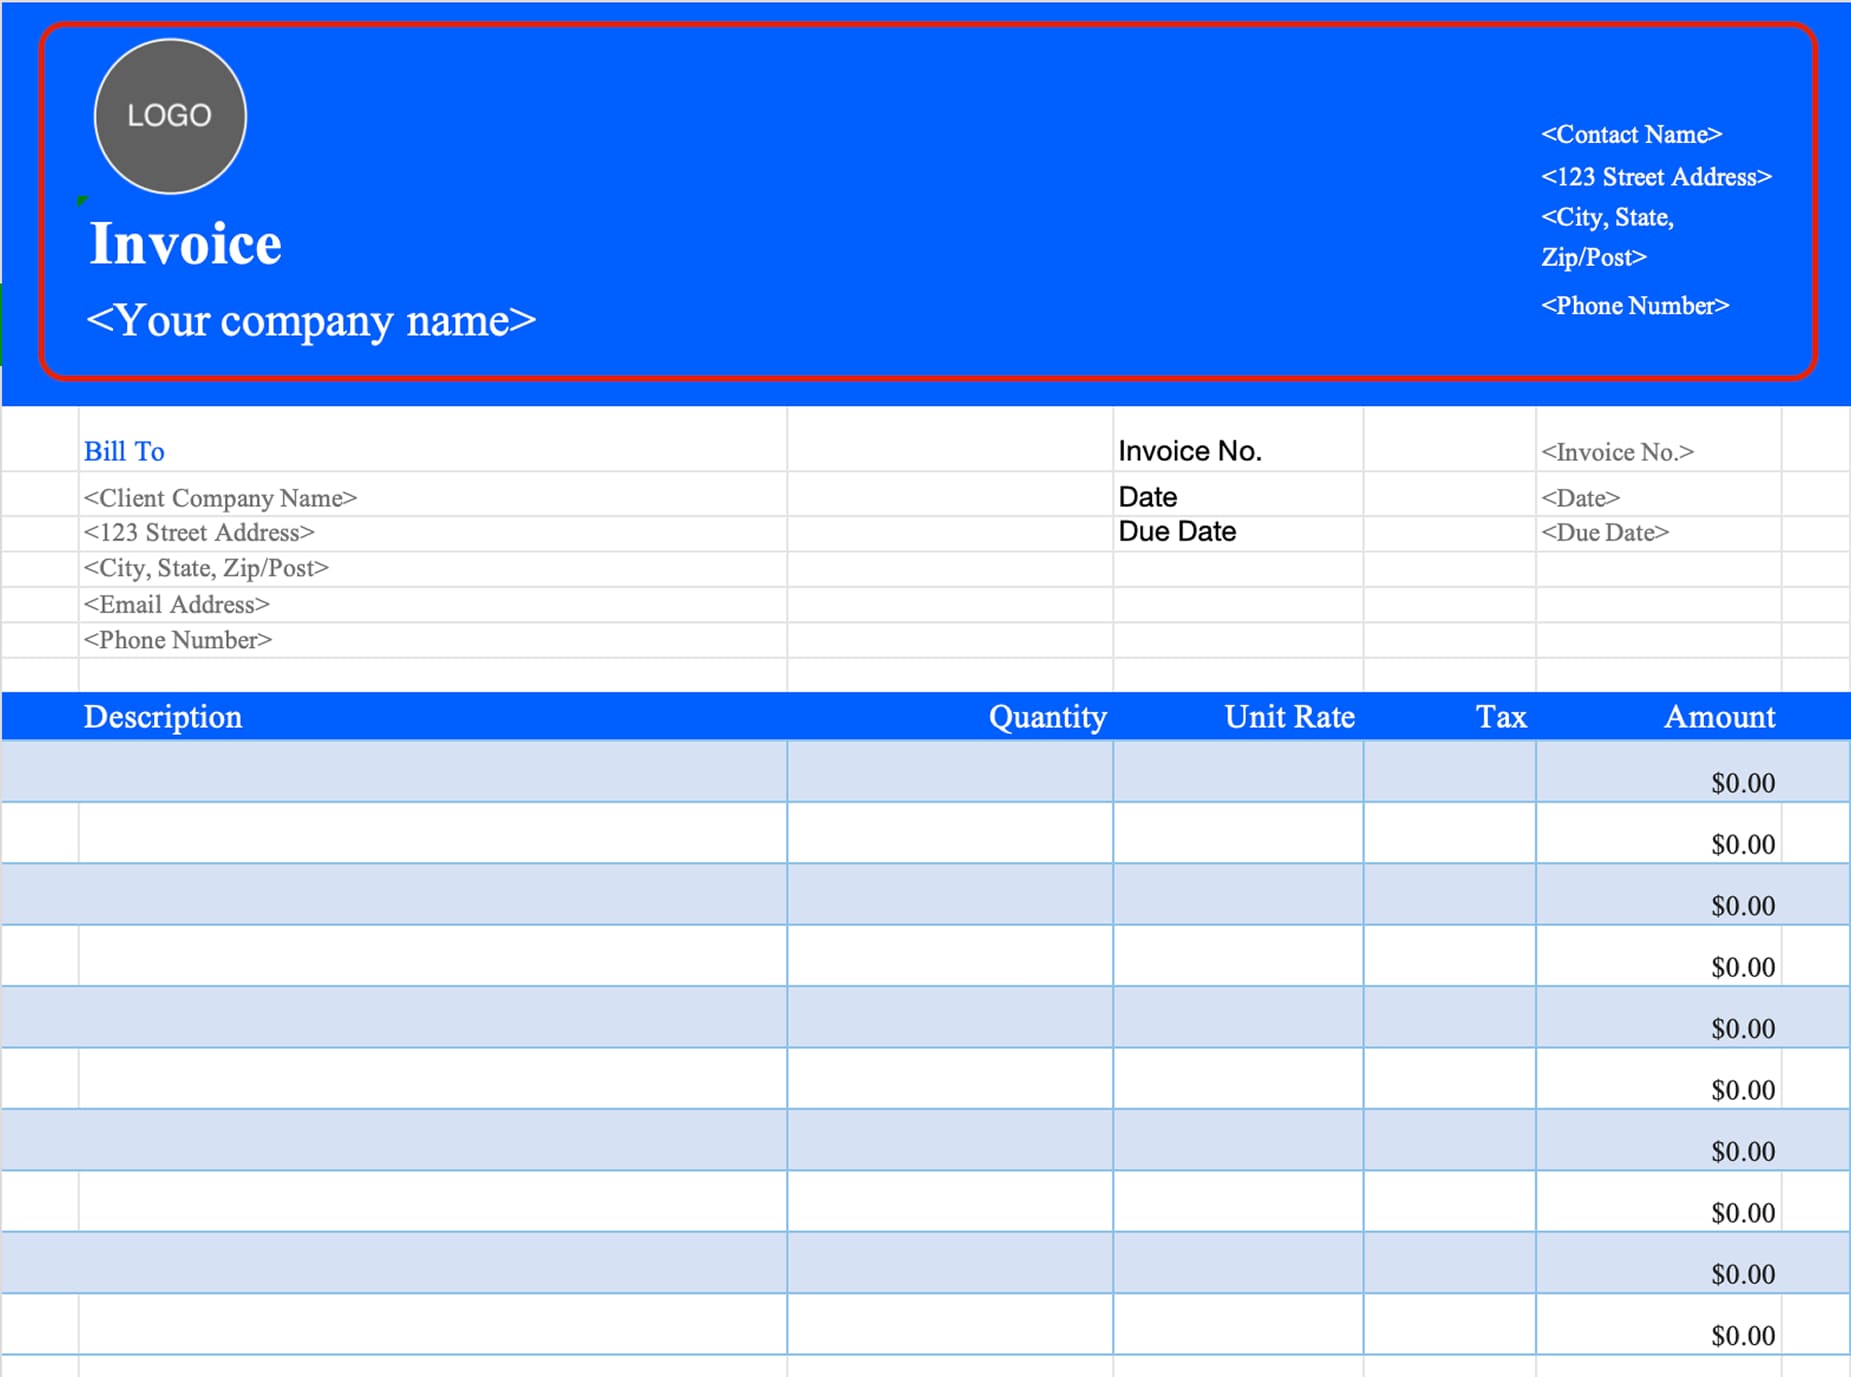
Required information:
- Business name
- Address
- Email or phone number
- Logo (optional but recommended)
Clear business information helps clients verify who the invoice is from and builds trust — and helps their accounts payable team process it without questions.
💡 Tip: Save your business profile so you don't need to re-enter it every time. see how →
Step 3: Add Client Information
Correct client details help avoid payment delays and disputes. Look for the "Bill To" section and enter the following details in the invoice template:
- Client or company name
- Billing address
- Invoice email address
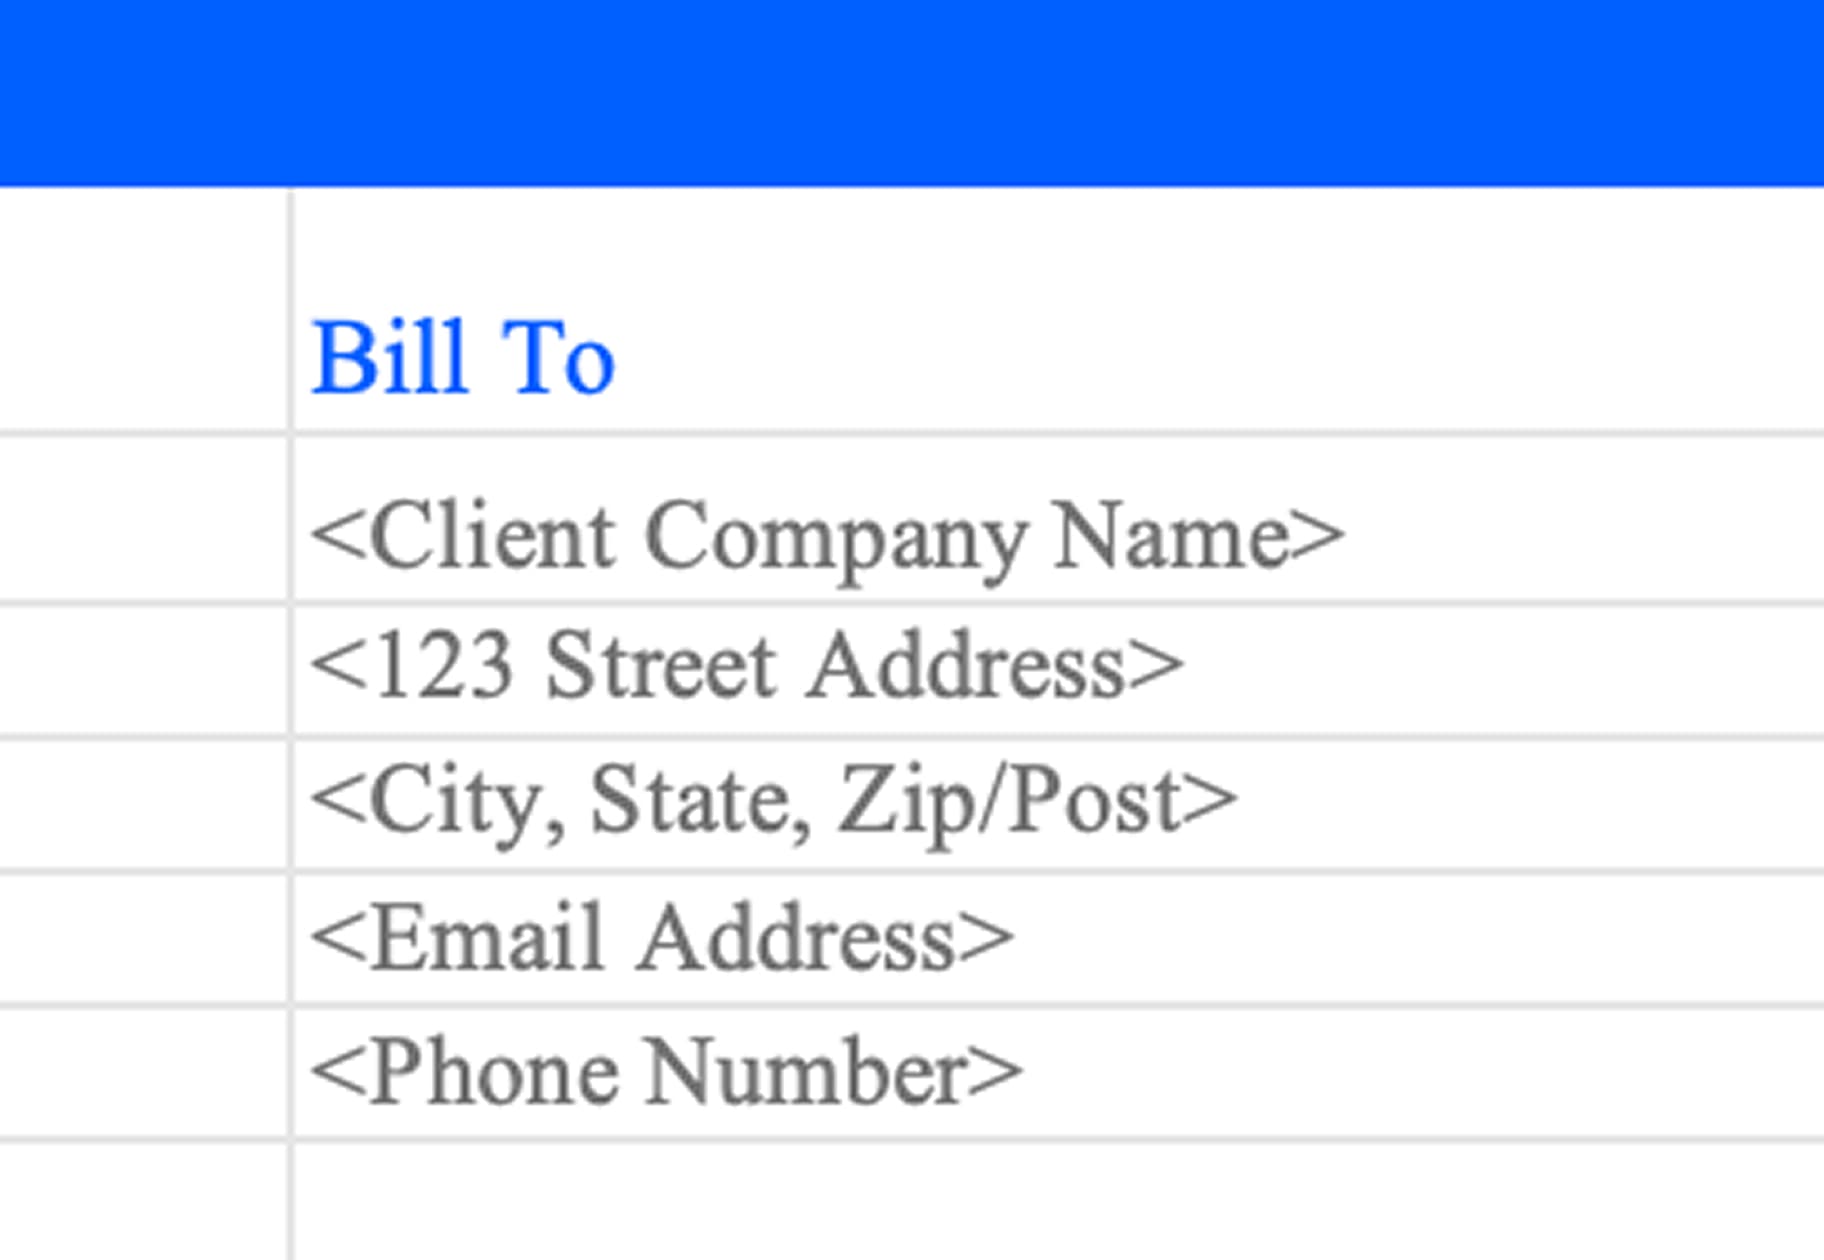
Using accurate, complete client information ensures the invoice reaches the right person and can be processed without issues. ❌ Avoid using nicknames or incomplete company names — the legal name on file processes fastest.
Step 4: Assign an Invoice Number and Dates
Every invoice should have clear identifiers for tracking and record-keeping. Add the following:
- Invoice number (must be unique)
- Invoice issue date
- Payment due date
Example numbering formats:
- INV-2025-001
- INV-CLIENT-002
A simple sequential system (10001, 10002, 10003…) works fine. What matters is never reusing a number — consistent numbering is what makes payment tracking and dispute resolution painless. Don't want to come up with one yourself? Use our free invoice number generator.
Step 5: List Products or Services
Use an itemized list so clients clearly understand what they're paying for. Standard fields:
- Description
- Quantity or hours
- Unit price
- Line total
Example: Website design service — 10 hours × $50 = $500
Write descriptions your client would recognize — "Design work – March" is easy to question, "Website design service, 10 hours at $50/hr" is easy to approve. Itemized invoices reduce questions, improve transparency, and speed up approvals and payments.
Step 6: Calculate Subtotal, Tax, and Discounts
Follow this calculation order:
- Subtotal
- Tax (VAT, GST, or sales tax if applicable)
- Discount (optional)
- Total amount due
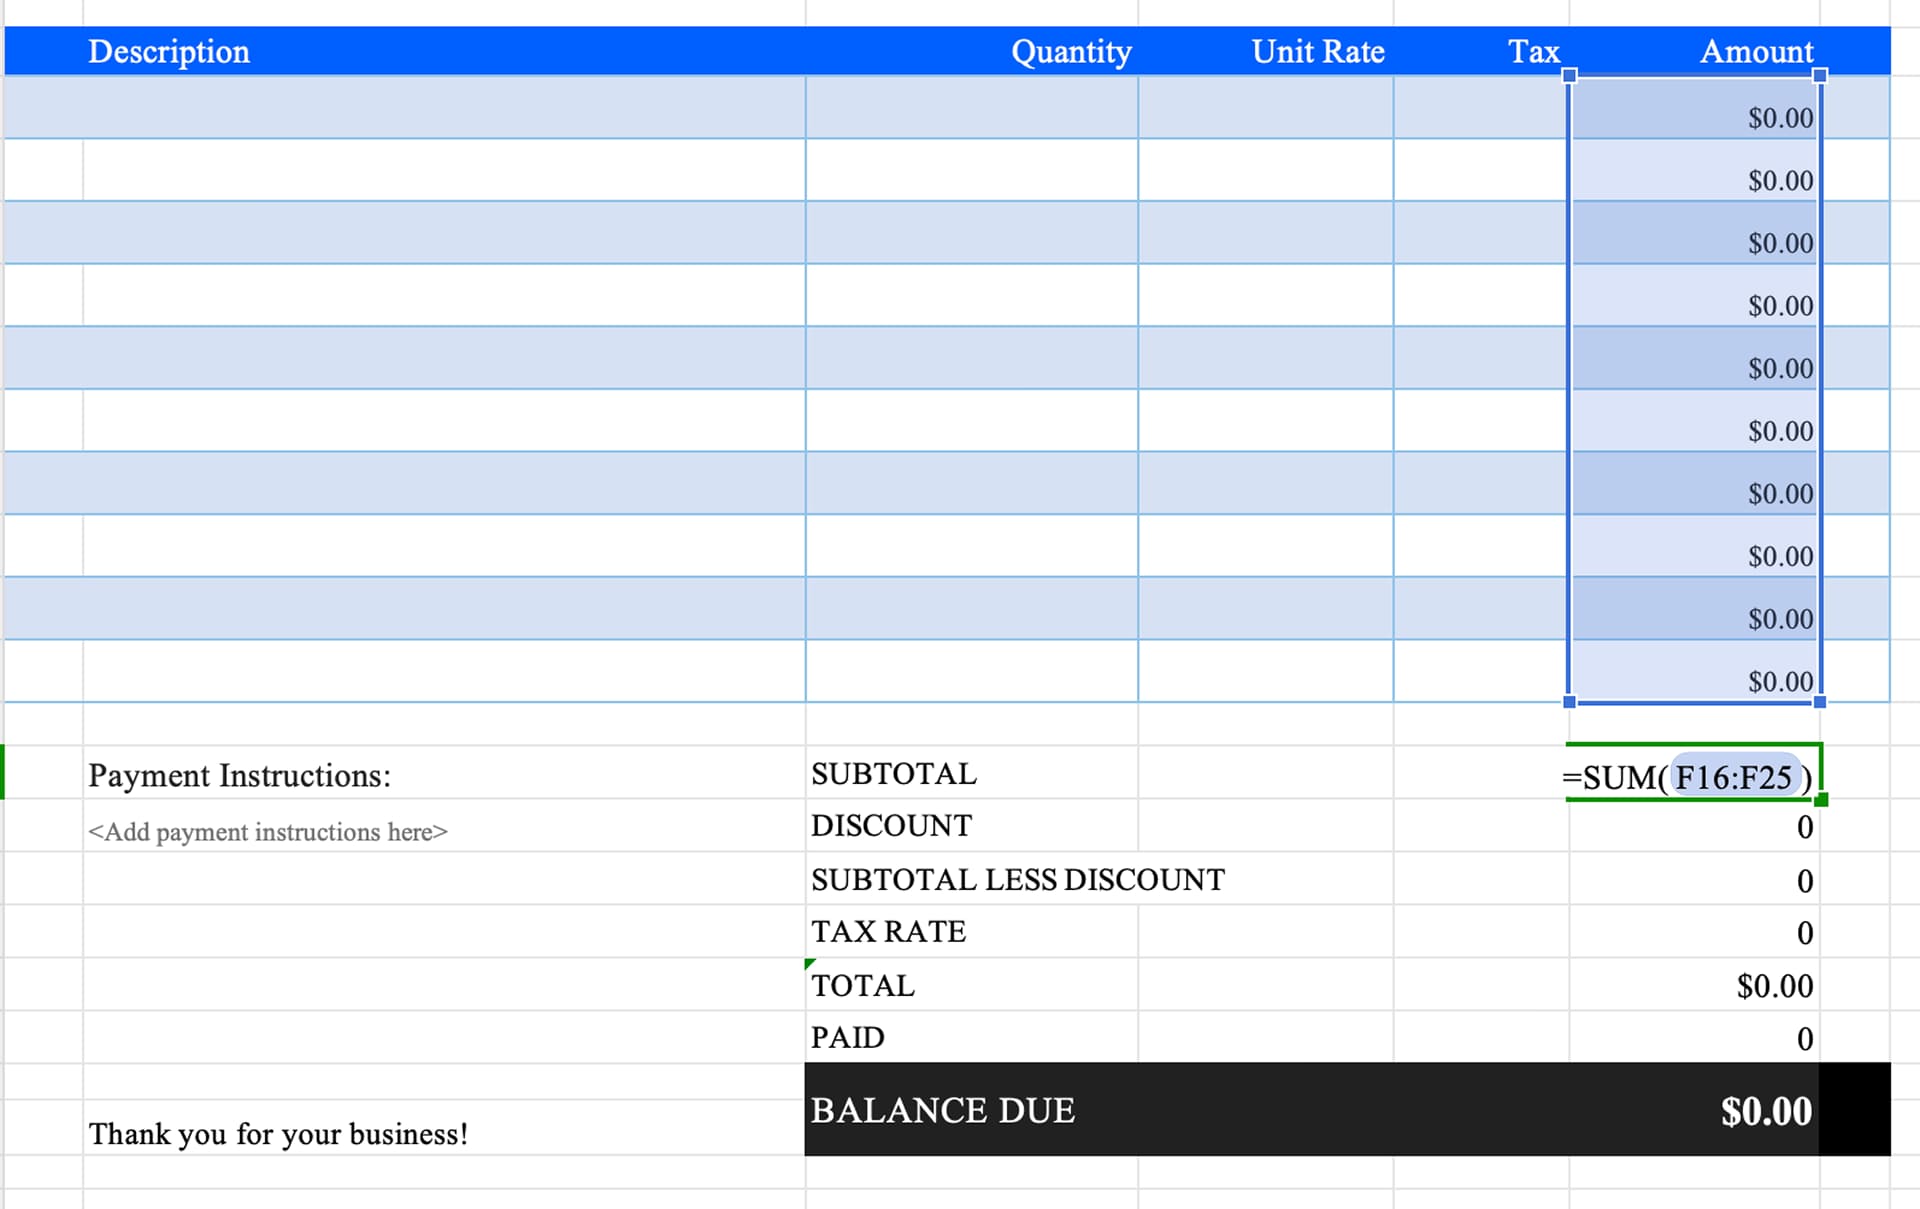
Most templates include built-in formulas, so at this step you usually only need to enter the tax rate and discount. However, calculations still depend on correct input — an outdated tax rate is the single most common invoicing error. Using an invoice generator or invoicing software helps avoid calculation mistakes and keeps totals accurate.
Step 7: Add Payment Terms and Methods
Clear payment terms help you get paid faster and set expectations upfront. This information is usually placed in the bottom-left section of the invoice. Include:
- Payment terms (Net 7, Net 14, Net 30)
- Accepted payment methods
- Late payment note (optional)
Example: Payment is due within 14 days of the invoice date.
Clear terms reduce confusion and minimize late payments — vague terms like "payment due on receipt" almost always mean slower payment than a specific due date.
Step 8: Review and Send the Invoice
Before sending, double-check:
- Totals and tax amounts
- Client email address
- Invoice number and due date
Send options:
- Download as PDF
- Email invoice directly
- Share invoice link
PDF format is recommended for professionalism and compatibility across devices — it looks identical everywhere and can't be accidentally edited by the client.
Step 9: Save the Invoice as a Reusable Template
If you invoice similar services repeatedly, save your invoice as a template. Best for:
- Monthly clients
- Fixed pricing services
- Recurring work
Templates save time, reduce errors, and help maintain a consistent brand image. If you need more speed and flexibility, our invoicing software lets you save client and product information for future use — this allows you to create and send invoices in just a few clicks, with advanced features like invoice management and payment tracking included.
Done learning — put it into practice
Save clients & products once, generate repeat invoices in a few clicks, and track every payment to the penny.
Start free with Invoice Zip →Invoice Best Practices
Once you've made your first invoice, these habits keep the process smooth:
- Use consistent numbering — one sequence, never reuse numbers
- State payment terms explicitly — "Net 30" beats "payment due on receipt"
- Send invoices as PDFs — they look the same on every device
- Save client and product details — reusable profiles cut invoicing time dramatically
- Turn on automatic payment reminders — polite nudges recover most late payments without an awkward email
- Follow up promptly — the best time to chase an invoice is the day after it's due, not a month later
How to Send an Invoice
Three common ways, in order of formality:
1. PDF attachment by email — the standard. Keep the email short:
Hi Sarah,
Please find attached invoice INV-2026-014 for the March website design project, due April 14. Let me know if you have any questions.
Best,
Alex
2. Shareable invoice link — the client opens a web page with the invoice; no attachment to lose, and you can see when it's opened.
3. Through invoicing software — the client receives the invoice with a built-in payment button, and you get automatic confirmation when it's viewed and paid.
FAQ
How do I make an invoice for free?
Use a free invoice generator or a downloadable template. A generator handles layout and math for you; a template gives you more control. Both options on Invoice Zip are free — you only need an account if you want to save client information and track payments.
What is the best format to send an invoice?
PDF. It renders identically on every device, can't be accidentally edited by the client, and looks professional. Spreadsheets (Excel/Google Sheets) are best kept as your internal working file, not what you send.
Can I make my own invoice without software?
Yes. A basic invoice needs only a document or spreadsheet with the 10 components listed above — many freelancers start with Word or Google Docs. The trade-off is manual work: you handle numbering, math, and record-keeping yourself.
What's the difference between an invoice and a receipt?
An invoice requests payment before it's received; a receipt confirms payment after the fact. You send an invoice when the work is done (or on an agreed schedule), and the client may later request a receipt as proof of payment.
What payment terms should I use?
Net 14 and Net 30 are the most common for small businesses. Use Net 7 for small projects or clients you don't know yet, and consider offering a small early-payment discount (e.g., 2% if paid within 7 days) to improve cash flow.
Most Popular Pages

Try Invoice Zip Today
Start Sending Invoices, Building Reports, Saving Office
Time and Get Paid Faster.